
Joining Yarn and Weaving in Ends So They Never Show
Two skills nobody teaches properly and everybody needs. Get them right and your work looks professionally finished; get them wrong and a beautiful jumper has a lump at the shoulder and a tail poking out at the cuff.
Where to join
At the edge of the row wherever possible. Ends woven into a seam disappear completely, and seams take the strain rather than the join. Never join in the middle of a plain expanse if you can help it, and never in ribbing that will be stretched.
Judge whether you have enough yarn for another row with the four-times rule: the remaining yarn should be at least four times the width of your work. If it isn't, join now rather than running out three stitches from the end.
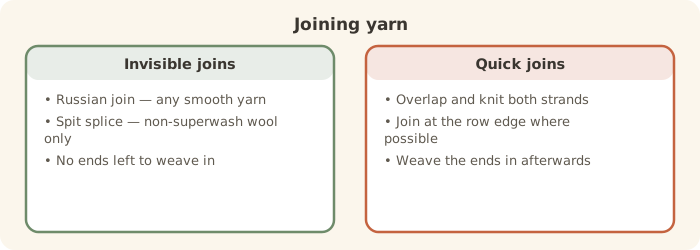
The Russian join
Thread each yarn end onto a needle and back into itself for an inch or so, forming two interlocking loops before pulling tight. It produces a continuous strand with no knot and no ends to weave — excellent for smooth yarns, and it takes about a minute.
The spit splice
Only works on non-superwash animal fibres, and works remarkably well. Untwist an inch of each end, overlap them, moisten, and roll vigorously between your palms until the friction and heat felt them together. The join is invisible and stronger than the yarn. Rather charmingly medieval, and completely reliable.
Simple overlap
Work several stitches holding both old and new yarn together, then drop the old. Fastest of all, leaves a slightly thicker patch, and is perfectly good for blankets and anything textured where it will never show.
How much yarn is left?
If you're joining because you're running low, it's worth knowing whether the next ball will finish the job. Our yardage calculator turns a weighed part-ball into a yardage figure so you can plan rather than hope.
Weaving in ends properly
The mistake is weaving in a straight line, which lets the end slide back out with wear and washing. Instead, use a blunt yarn needle and travel through the bumps on the wrong side for an inch or so, then change direction and travel back the other way for half an inch. That change of direction is what locks it. Trim close, but not flush — leave a few millimetres so it can't work its way through.
Match the path of the yarn where you can: weave through purl bumps in stocking stitch, along the ridges in garter, and inside the columns in ribbing.
Weave as you go. A granny square blanket in three colours can hold three hundred ends. Finishing each square completely as you make it turns a horrible final chore into something you barely notice — and it is the single most common reason blankets end up abandoned in bags.
Crocheting over ends
In crochet you can lay the tail along the top of the previous row and work the next round of stitches over it, enclosing it completely. It takes no extra time at all and removes the end entirely. There is no equivalent in knitting, which is one small point in crochet's favour.
Questions we're often asked
How do I join a new ball of yarn?
At the edge of a row where possible. Use a Russian join or spit splice for an invisible result, or simply work a few stitches with both strands held together and weave the ends in afterwards.
Will my woven ends come undone in the wash?
Not if you change direction at least once while weaving. Ends woven in a straight line can work loose; ends that double back lock themselves in place.
How much yarn do I need to finish a row?
About four times the width of your knitting. Less than that and you risk running out mid-row, which is far more annoying than joining early.